A Saltwater aquarium is generally more expensive and requires more work than their freshwater counterparts. That said, the key to success with either saltwater or freshwater tank is regular maintenance and the right equipment.
We can focus on the basics and keep the costs down and still ensure success. We’ll cover what you need, provide suggestions, and explain each.
Let’s dive into the requirements.
2 Types Of Saltwater Tanks - FOWLR & Reef
FOWLR
FOWLR stands for Fish Only With Live Rock. This is the easier route. It’s also going to be less expensive. A FOWLR tank doesn’t have corals and doesn’t require expensive lights.
The “Fish” part is obvious but what’s the “Live Rock” part? Well, the primary filter for a saltwater aquarium of any kind is beneficial bacteria. The bacteria live in porous rock. The rock itself isn’t actually alive obviously but it’s called Live Rock because of the bacteria living within it. Less is needed for a FOWLR tank than a Reef aquarium.
Reef
Reef tanks are those with corals in addition to fish. The idea is mimicking a natural coral reef. Expensive lights are required since most corals need powerful lights to survive. Corals can eat foods but most also feed themselves photosynthetically and are required for them to live and thrive. A reef tank is also going to need more live rock than a FOWLR tank.
A reef aquarium is going to be more beautiful due to the addition of corals you will need to potentially spot-feed some corals and pay attention to how close to the lights some corals are placed. Also, some corals will require additives to be healthy and grow.
Suggestion
Start with a FOWLR and eventually expand to a Reef tank. You can add expensive lights later and learn about maintaining basic saltwater parameters well before stepping up to caring for corals.
Picking A Tank
You may think that a smaller tank is easier but that isn’t exactly true. Salt tank parameters can get well out of range much more quickly with small tanks. Big tanks tend to fluctuate much more slowly which will cause much less stress on your fish and corals.
Big tanks cost more and require more work but the work that is required can be done less often. Small tanks may not need much effort to maintain them but you may need to service them much more often to keep fish and corals healthy.
The cost of a big tank will grow exponentially with the addition of equipment. For instance, a small inexpensive light might be all that is needed for a particularly small aquarium with corals. A larger aquarium like my 125-gallon tank with corals has 3 expensive and powerful LED lights hanging over it. The same is true for protein skimmers, sumps, pumps, reactors, or whatever you find you need to keep your aquarium healthy and stable.
Another consideration is many companies sell All-In-One (AIO) tanks that contain everything you need. They are not inexpensive but they take the guesswork out of picking equipment. They are usually very high quality and a good route to go if your budget can handle it.
All-In-One Tank System
AIO aquariums simplify getting started in the saltwater tank hobby easily. The appeal is that you’ll have all of the hardware that you need and it will all be sized appropriately for the size aquarium you choose.
Once you have picked your AIO all you need is water, rocks, and fish. You can add sand if you like but it isn’t required. Bare bottom vs sand bed is a topic all its own which I won’t dive into but I will say most people go with a sand bed for aesthetic reasons if nothing else.
AIOs also are typically high-quality across the board. I suspect the reason for this is that when you’re buying an AIO the price tag is going to be high because you’re seeing the grand total for all of your equipment and manufacturers want you to feel like you’re getting your money’s worth.
Red Sea is probably the best-known manufacturer in the AIO tank system space. They produce excellent equipment and I’ve owned 2 of their AIO tanks myself. I’ve owned is the Red Sea Max E-Series 170 AIO. It’s a small 45-gallon aquarium that is a very manageable size but not so small that it would be too sensitive to parameter swings. If you can go bigger I highly recommend it but I wouldn’t go any smaller than this.
Off-The-Shelf Tank
As I mentioned, I’ve owned two Red Sea AIO aquariums, but I prefer to pick my components. Being able to pick equipment based on how I want to run my aquarium. I can also spend more on equipment that I feel is more important, and save a few dollars on equipment I place less value on or even feel I don’t want or need.
Chances are you may have some components from a freshwater tank that you’re looking to take advantage of to start up your first saltwater aquarium. If this is you, I’ll recommend specific equipment to take out the guesswork (as best I can).
As for an off-the-shelf aquarium, I recommend going with a tank that has an integrated sump or can be plumbed to a sump beneath the aquarium stand. An integrated sump is an aquarium that has a portion sectioned off in the rear of the tank. A better route is a tank that is drilled for plumbing that can run underneath your tank and into a sump in the stand.
A sump is essentially a separate tank that can hold equipment. By having a dedicated sump area you can easily hide the larger amount of equipment that typically is used with saltwater aquariums.
A sump underneath your main aquarium is ideal since it is typically much larger than a sump integrated into the back of the aquarium. It adds to the volume of the entire system which helps with stability. It better hides equipment out of sight. A larger sump area allows you access to a wider variety of equipment since you won’t be restricted to equipment that can fit into the usually narrow space built into the back of an aquarium with a built-in sump.
If you find aquariums with built-in sumps or those that have been drilled too expensive for your budget, you can go with a standard non-drilled aquarium and get an overflow that pulls water over-the-back and can be plumbed down to a sump underneath the main aquarium and inside the stand.
You can also skip the overflow and entirely with hang-on-back equipment. Choices will be a bit limiting but this is how I got started and was able to get a good tank going this way.
The last note to keep in mind when selecting a tank is lighting. Long tanks will require more lights which can be expensive. A square tank can usually get by with a single light that is capable of growing corals and will look spectacular.
Suggestion
Start with an All-In-One tank system if you can but work with your budget and get the biggest tank you can afford that will also fit in your space. Sumps aren’t required but definitely preferred.
45 Gallon All-In-One Red Sea MAX E 170
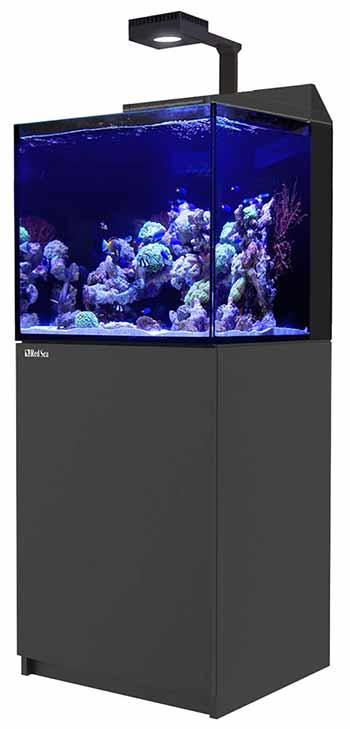
If you’re interested in getting into the saltwater aquarium hobby, an All-In-One aquarium makes it as easy as possible. These AIO aquariums include almost everything you need. You just need to add sand, live rock, saltwater, and fish.
The Red Sea MAX E 170 is only 45 gallons (37 gallons in the main display tank and 8 gallons in the rear sump) but this is large enough that it will provide a stable volume of water.
This aquarium includes a powerful LED light capable of growing corals and can be controlled by an app on your phone. It also includes a rear sump that you can add filter media such as biological, carbon, or chemical media to help control.
Lighting
FOWLR Lighting
If you’re going with a FOWLR tank you don’t need to spend a lot of money on lighting. I recommend going with LED lighting though if for no other reason than you won’t need to worry about replacing bulbs. There are also other benefits like being able to control them from your phone.
For a FOWLR tank just pick whatever best fits the dimensions of your aquarium and doesn’t cost much.
Reef Lighting
Corals have high lighting demands. If you plan on trying to run a reef tank you’re going to need to spend some real money on lighting. Again, I think LED lights are the way to go here. They’ve proven more than capable of growing corals.
I’m a big fan of Kessil LED lights. The Kessil A360x is a great choice. You may have to purchase two or more to properly cover your entire aquarium. If your tank is square-shaped one should work but rectangular tanks often require two or three.
Suggestion
Go as cheap as you can for FOWLR tanks but plan on spending some money on reef lighting. Either way, I recommend LED lights.
Many love Kessil because they’re the only LED manufacturer that produces a dense array of LEDs that closely mimic a single point of light. All other LED lighting suffers from the disco ball effect. The disco ball effect is when you get different color patterns cast on the rocks and substrate.
It’s a shame there isn’t much worthy competition that can resolve the disco ball effect problem. Hopefully, this will change in the future but for now, Kessil is the only game in town to solve it.
Other LED manufacturers make some great lights but once you see the difference it’ll likely bug you as it does me.
Kessil A360x
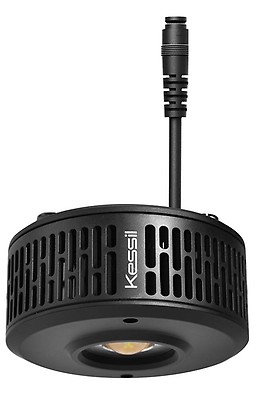
Kessil LED lights lead the market in LED aquarium lighting. Their ability to produce lights with a dense LED matrix allows their lights to mimic a single bulb extremely closely. This design virtually eliminates the disco ball effect of other LED lights as the water refracts the individual LEDs onto the sand bed.
Filtration System
If you’re unfamiliar with saltwater aquarium filtration you may be surprised to learn that the majority of the filtration occurs within rocks that bacteria can live within. This doesn’t mean you can get away without any filters, but it does mean that you’ll need to factor this into your filtration solution. The most important thing to know about helpful bacteria is that it requires a decent amount of flow through the rocks to allow the bacteria better access to the water.
The most common filters that you’ll find on a saltwater aquarium is protein skimmers, filter socks, and refugium. Some people will use canister filters or hang-on-back filters that are more common in saltwater aquariums.
Protein Skimmer
A Protein Skimming is a fairly ubiquitous addition to saltwater aquariums. They pull organic matter out of the water before it can decompose into harmful nitrite and nitrate. They work by running the tank water through the skimmer and adding air bubbles. Organic waste turns into foam and floats up into a collection cup that you’ll need to dump periodically.
Tuning your protein skimmer to create an ideal amount of foam that isn’t too wet does require some trial and error but ultimately is an incredible way of removing a lot of organic waste from your aquarium before it can cause trouble.
It’s possible to get a hang-on-back protein skimmer that will work very well but larger skimmers are available which are designed to work in a sump. Larger isn’t better but a larger tank will require a large protein skimmer.
Filter Socks
When you have a traditional sump under your tank, usually it will have a filter sock positioned under the outlet for water coming from your main display tank.
The great thing about filter socks is that they pull large organics out of the water easily. Generally, this is going to be excess food that wasn’t eaten by your fish. This is obviously good because it pulls the organics out before they have a chance to breakdown into harmful elements.
The bad thing is that you have to either clean or replace your filter socks regularly. If you don’t stay on top of your filter socks they can get quite gross and allow the organics to breakdown and cause serious problems. It’s a quick and easy job though. Just don’t procrastinate.
Filter socks aren’t required but I’d venture to guess that 9 out of 10 tanks with sumps in the stand have filter socks, if not more.
Refugium
My favorite filtration method is the refugium. A refugium is usually a section in your sump where you keep macroalgae like Chaetomorpha. It requires a powerful light to grow the macroalgae and typically the more powerful the more effective refugium.
What a refugium does is pull phosphates and nitrates out of the water. Phosphates are what algae feed on. All sorts of algae can be problematic in a marine aquarium. A good size refugium with powerful bulbs can all but eliminate algae problems.
A good refugium can also host copepods and nauplii. These are tiny saltwater bugs that feed on fish waste and other organic matter. Not only do these little critters do a great job helping keep your water clean but your fish will love munching on the ones that find their way up into the main tank. They’re an excellent source of healthy food for not just the fish but also corals.
If you end up not going with a sump for whatever reason, you can still add a refugium. There are hang-on-back refugium that can help pull phosphates out of the water naturally quite well if proper lighting is used.
It’s possible to skip using filter socks and a protein skimmer and just go with a large refugium but I wouldn’t recommend that for a beginner. Filter socks and protein skimmers have benefits that you probably don’t want to miss out on.
Reactor
Reactors are similar to canister filters in a lot of ways. They are essentially just a reaction chamber for media to “react” to the water in. Water gets pumped through the reactor just like a canister filter but they don’t have a built-in pump and rely on an external pump to force water through it.
Reactors typically only utilize a single type of media in them and don’t contain trays or areas for multiple kinds of media. They are often designed to work best with a specific kind of media. Simple media reactor designs can accommodate granular ferric oxide, carbon, or similar small grain media.
There are reactors with integrated grow lights specifically for growing algae to help remove phosphate. Another purpose-specific reactor is a calcium reactor. It holds dead coral fragments and has an attachment to add a CO2 canister and slowly feed CO2 that will break down the dead coral frags and release calcium into your reef tank and help corals grow.
Reactors aren’t really considered by many to be a standard piece of aquarium filtration but they are great additions for dealing with specific problems. If you have yellow water a reactor with carbon will transform it crystal clear. If you have high phosphates you can add some GFO to your reactor and adjust the flow to gently tumble the GFO media in the canister and lower your phosphates.
Canister Filter
Canister filters are not as common in saltwater aquariums but they can definitely be used. They can be a reliable means to control ammonia and nitrite but they require frequent cleaning. Many people complain about their difficulty with cleaning them yet some don’t seem to have the same trouble.
I’ve used canister filters on freshwater aquariums and personally didn’t care for how leak-prone the ones I had were. I also didn’t find them the easiest to maintain.
A canister filter can be a great tool to help keep your water parameters in check but there are other products that most people consider more reliable, easier to maintain, and more effective.
It’s been some time since then and I’m sure designs have improved, but I wouldn’t recommend using one unless you already have one and are willing to stay on top of them weekly.
Hang-On-Back Filter
Hang-on-back filters are very common in the freshwater aquarium world but are extremely rare in FOWLR and reef tanks. If you have one, however, it can be a useful addition when starting a marine aquarium.
You can put various kinds of filter media in it. Carbon can be used to help keep the water crystal clear. Phosguard or Phosban can help cut down on phosphates. You can also add some Marine Pure Bio-Media to help give the helpful bacteria more surface area to live.
You can think of a hang-on-back filter like a reactor. It’s a great supplemental filter to attack a specific problem or supplement in a singular way.
Suggestion
Incorporate a sump below your aquarium if possible and ensure that it has room for a protein skimmer, filter socks, and ideally a refugium.
Purchase high-quality grow lights to make the refugium extremely effective. I’m a big fan of Kessil and they have an excellent grow light that I recommend for sub-70 gallon tanks.
Don’t waste money on the other filter methods described above unless you have a specific need for a reactor or have one of the other types of equipment and would like to put it to good use.
AquaMaxx FC-80 In-Sump Protein Skimmer
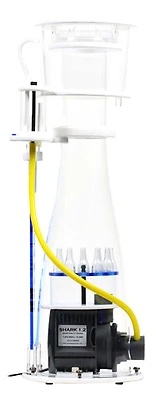
Protein Skimmers are extremely popular methods of removing fish waste and uneaten food before it breaks down into harmful byproducts. It works by injecting bubbles into the water. If dissolved organics are in the water it will create a foam and rise to the collection cup. Simply dump the cup during regular maintenance to help maintain pristine water quality.
Pumps & Powerheads
Pumps and powerheads are what move water in your aquarium. Powerheads are just a propeller or prop like on a boat that forces water across your aquarium. A pump is designed to move water from one location, through a hose, to another. Let’s go into a little more detail.
Return Pump
If you have a sump, whether it’s built into the back of your main aquarium or it’s underneath in the stand, you’ll need a return pump.
A return pump is the main driver of water through your marine tank. If it’s strong enough, it can also create enough flow to push water through the rocks in your main aquarium when it returns it back from the sump area.
There are traditional on/off type return pumps that only flow a set amount of water and there are controllable pumps that allow you to dial-up or down the amount of flow.
Adjustable pumps are newer to the hobby but have been found to be handy at adjusting flow for a variety of reasons. Traditional pumps that are either pumping full blast or off are cheaper but less flexible.
Powerhead
If you don’t have enough flow generated by your return pump in your main tank you can supplement the flow with the addition of a powerhead. You need good flow through your rockwork to allow the bacteria living within it to thoroughly break down ammonia and nitrite buildup in the water.
Powerheads tend to be bulky and unsightly but very commonly used since a single return pump often can’t produce enough flow or flow in the right area.
There are various powerhead designs. Some are less obtrusive than others. Maxspect makes a linear and very unobtrusive powerhead called the Gyre. EcoTech Marine makes a very unique and clever powerhead called the Vortech. It mounts the motor on the outside of the aquarium glass and the impeller on the inside. The motor turns the impeller through the glass with magnets.
Suggestion
I recommend purchasing a return pump that is more powerful than necessary for your aquarium. I also recommend that you get a pump that is controllable. By having a more than powerful enough pump that is adjustable you will have more latitude to tune the flow of your return pump.
You’ll also want to plan on purchasing a powerhead. It’s likely that you will have some areas in your display tank that won’t have much flow. The addition of a powerhead is the easiest way to solve this. There are plenty of inexpensive powerheads such as the Hydor Koralia line. If you can afford a Gyre or Vortech, these are both high-quality powerheads that are much less obtrusive than some of the cheaper options.
Maxspect Gyre 330 Powerhead
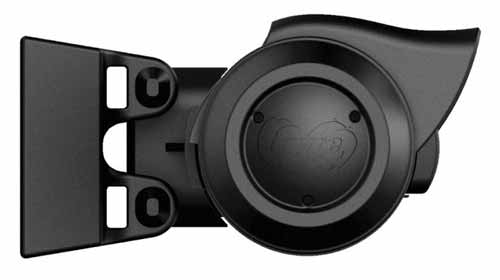
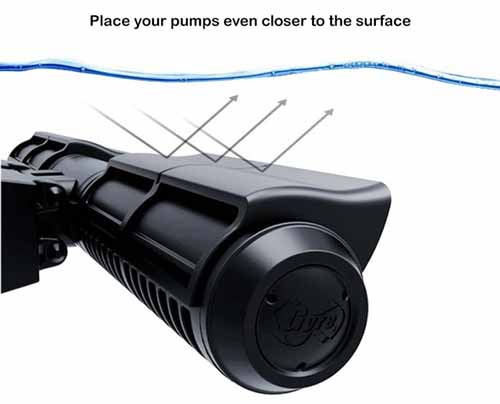

Water flow is important for your aquarium. Your return pump will create some flow but often it’s not enough. An additional pump called a powerhead is usually added to improve water flow. The Maxspect Gyre is unique among powerheads. It is unusually compact as well as powerful. Powerheads in your tank distract from the beauty of the inhabitants. An unobtrusive yet powerful powerhead like the Gyre makes it very desirable.
Thermometer & Heater
75-80 degrees Fahrenheit is a good range for maintaining your marine aquarium. It’s important to maintain a consistent temperature. Consistency and stability are important to the health of your saltwater fish and corals. This includes not only using a quality heating solution but also reliable measurement.
Thermometer
Your heater will most likely be able to be adjusted to a temperature. The temperature listed on your heater may not be accurate. You should always rely on a thermometer to confirm the temperature. It’s also smart to have more than one method of checking your temperature.
I suggest one analog and one digital thermometer. An inexpensive analog thermometer that I own and love is a floating thermometer that can measure temperature and specific gravity. Set it in a low flow area where it won’t bob around and you will be able to read the salinity based on its buoyancy. If you’re not familiar with the term specific gravity, it’s another way of saying salinity.
As for the second thermometer I recommend something a little more sophisticated but doesn’t break the bank. A heater controller with a temperature probe can serve as the primary method for controlling the temperature of your heater. Alternatively, you can use it as a fail-safe and let the thermostat built into the thermometer be the primary method of turning on and off the heater.
Heater
As I mentioned, don’t assume your heater is adjusted accurately from the factory. Confirm the setting with a thermometer.
Bear in mind that heaters can fail not only by not heating but also by sticking in the on position and over-heating your aquarium. Both of these situations can obviously be catastrophic.
I recommend running 2 heaters due to the importance of ensuring your tank temperature is maintained. Heaters are reasonably reliable but I’ve had more than one fail on me. Some people will tell you to replace your heaters every year. If you go with 2 heaters you won’t need to worry about failure nearly as much.
Heaters come with 2 different types of temperature control mechanisms – mechanical and digital. Each of these mechanisms has different ways they fail. If you’re going to run 2 heaters it’s smart to run 1 of each kind. Using one of each kind means that the same situation won’t likely cause both to fail at the same time.
Suggestion
I recommend 2 thermometers and 2 heaters. Each of these should use different mechanisms – one analog/mechanical and one digital/electronic.
Incorporating a heater controller can help provide controller redundancy and protection not only for heaters that don’t come on due to failure with the temperature trigger built into the heater, but those that stick on and could overheat your tank.
Hygrometer &
Thermometer
Temperature
Controller
Analog
Heater
Digital
Heater
Live Rock & Sand
Live Rock
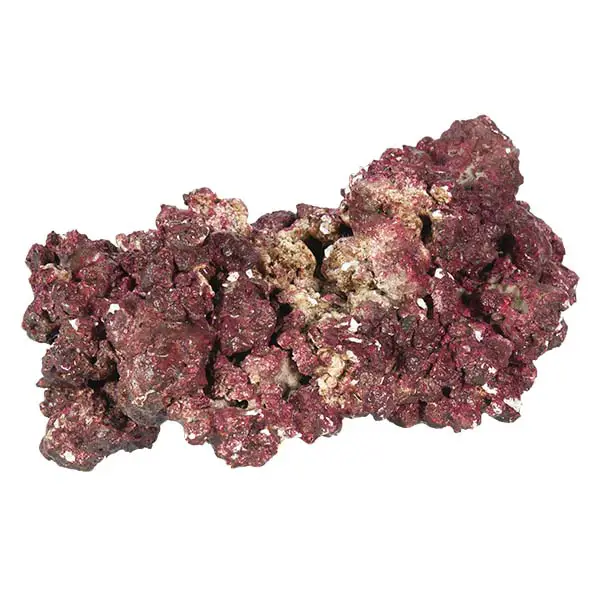
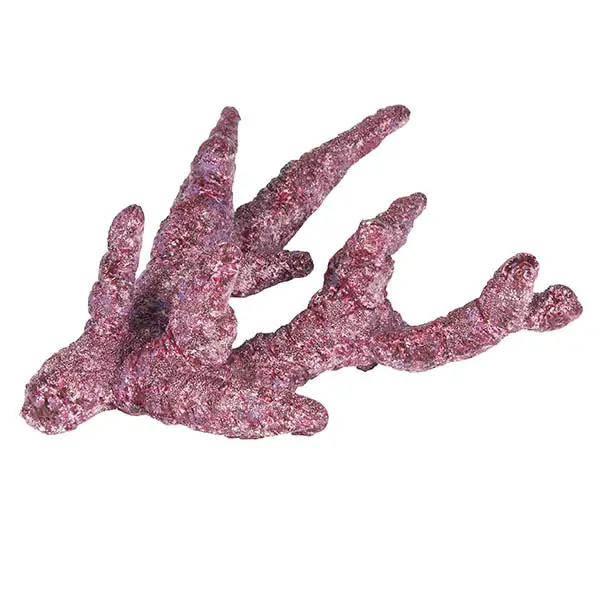
Saltwater aquariums rely on porous rockwork to host bacteria for biological filtration and to help maintain water quality. Marine aquarium rock that is capable of hosting bacteria is porous and has many microscopic holes and pores that not only give bacteria a place to live, but also allow water to easily flow in, around, and through the rock so the bacteria can convert ammonia and nitrate into less harmful byproducts.
You can purchase rocks with bacteria living within it to start your aquarium or you can purchase dead rocks and allow your aquarium to cycle naturally for several weeks until beneficial bacteria begins to grow.
Sand Substrate
Most saltwater tanks, whether FOWLR or Reef with have a sand bed. This substrate can vary in color and grain size.
There are pros and cons to a sand bed but a substrate isn’t required to have. Most people, myself included, opt for adding sand to the bottom of our tanks because it looks nicer than a bare bottom marine aquarium.
There are different types of sand substrate you can choose from. These choices are mostly aesthetic. The nicest-looking substrate in my opinion is the finest grain sand. However, I don’t recommend it and I don’t use it myself. The reason is that a fine and light substrate is easily blown by water flow and you can end up with bare spots on the bottom of your tank in areas of high flow.
Medium grain is what many use. It still looks very nice but is less likely to allow bare spots to develop over time.
Suggestion
I highly recommend purchasing a high-quality live rock with bacteria already living within it. You should be able to add fish and corals to your aquarium much faster with actual live rock. Place the live rock in your aquarium and test nitrates. When your nitrates are it’s safe to begin adding fish and corals.
As for aquarium sand, I recommend medium grain sand. CaribSea produces various sand types and they come wet with bacteria in the sand. This can help kickstart biological filtration.
Live Rock - Natural
Live Rock - Branch
Medium Grain Sand
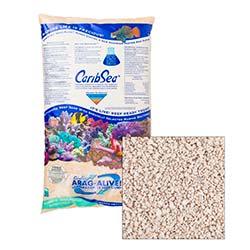
Fiji Pink Sand

Saltwater & Freshwater
You’re going to need a steady stream of both fresh and saltwater to properly maintain your saltwater aquarium. The key to a healthy aquarium is regular saltwater changes. As good as the filtration methods we use may be, they’re no substitute for a proper water change on a weekly basis.
Saltwater fish and invertebrates are more sensitive to aquarium water quality fluctuations and regular water changes will ensure their health better than anything else you can do.
You can usually purchase pre-mixed saltwater from your local fish store. This can help you put off getting a quality solution for creating your own saltwater and freshwater but ultimately you’re going to want to get your own RO/DI system to eliminate the need to haul heavy jugs of water back and forth from your local fish store.
Freshwater is not only used for making salt water but it is also what you want to use to top off your saltwater aquarium when evaporation reduces the water volume. If you were to add salt water instead of fresh you would end up raising the salinity of the aquarium. Always use fresh water when topping up your aquarium due to evaporation.
Never use tap water. Tap water contains an extremely high amount of phosphates which will cause an algae bloom. Also, there is chlorine and other harsh chemicals that would be harmful to marine fish and invertebrates.
Suggestion
Pick up a reverse osmosis filter and make your own pure freshwater. They’re easy to tap into your plumbing under a sink and can make all the fresh water and salt water you’ll need easily. You’ll want 2 large containers for storage. An inexpensive solution is to pick up 2 Brute 55 gallon trash cans. If you don’t have the room to accommodate those there are smaller Brute trash cans that can work.
Get some proper aquarium salt so you can mix the salt with the reverse osmosis freshwater to mix your own saltwater. Quality aquarium salt mix will have not only salt but trace minerals that are beneficial to fish and invertebrates.
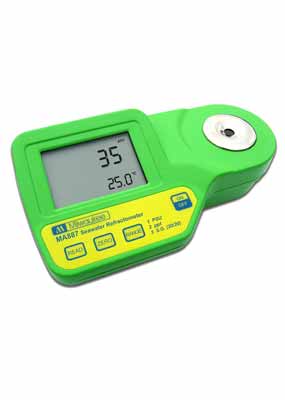
You’ll also have to get something that will allow you to measure the salinity of your aquarium water. There are various tools on the market but the absolute best, easiest, and most reliable is the Milwaukee Digital Refractometer. It’s worth the investment.
Reverse Osmosis Filter
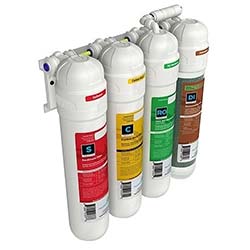
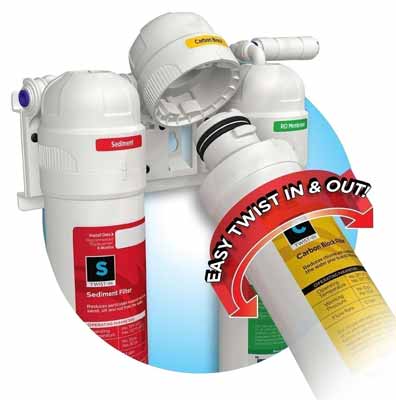
Tap water isn’t going to work for your saltwater aquarium. It has high phosphates which will cause algae blooms and also contains harsh chemicals like chlorine that aren’t good for fish or corals. A quality reverse osmosis filtration system can purify your tap water so you can mix your own saltwater at home.
Testing & Maintenance
New aquariums take time to stabilize. Don’t plan to add fish and corals immediately. You have to test the parameters often until the numbers fall to safe levels.
Testing
When it comes to testing, you could test for a lot of different saltwater parameters but there are only a few that are truly important for regular testing if you’re performing regular water changes.
Aside from ensuring your temperature stays between 75-80 degrees and your specific gravity (aka salinity) stays between 1.023-1.025, alkalinity, phosphate, and nitrate are the most important parameters to test.
If you plan to only run a FOWLR tank it will be less important to test for alkalinity and it will probably be within a reasonable range by simply performing water changes and performing basic aquarium maintenance. Alkalinity is far more important when growing corals that have a hard calcium-based skeletal structure.
Alkalinity
Alkalinity is a determining factor in coral health and also has a direct impact on pH levels in your aquarium.
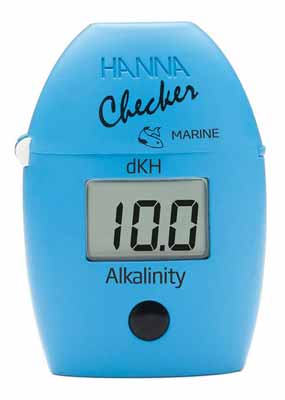
There are several manufacturers of test kits for alkalinity but if your budget can afford it, the Hanna Alkalinity Checker is the most user-friendly option. Otherwise, you can go with the Red Sea Alkalinity Test Kit.
Alkalinity should be between 8-12 dkH. There are various supplements and methods to adjust alkalinity. One easy one is to use SeaChem Reef Carbonate. Just test regularly and follow the instructions on the bottle.
Again, if you’re not going to grow corals and only care for fish, this won’t be important.
Phosphate
Phosphate is what drives algae growth and if you want to keep your new saltwater aquarium algae-free the best way to do that is to keep phosphates low.
The main method of keeping phosphates low is not over-feeding. Phosphates come from fish waste and uneaten food decomposing. You can’t eliminate phosphates this way but you can keep them better under control by not feeding too much unnecessarily.
Maintaining phosphate within a range of 0.03-0.07ppm is ideal for a new aquarium (<2 years). Once a new aquarium has become established phosphate can go as high as 0.1ppm assuming there aren’t issues with the tank.
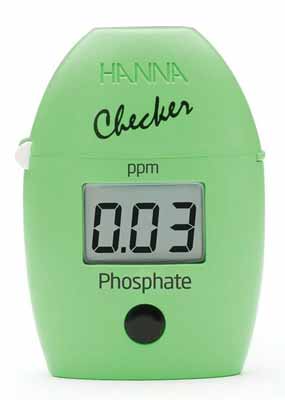
The Hanna Low-Range Phosphate Checker is the go-to tool for keeping an eye on phosphate levels. The Salifert Phosphate Test Kit is much less expensive if you’re watching your budget.
Growing macroalgae like chaetomorpha in a refugium with powerful grow LEDs is the most effective way of reducing phosphate naturally.
A protein skimmer is another great method of controlling phosphate. Skimmers will pull dissolved organics out of the water column before they break down and have a chance to release phosphate. The dissolved fish waste and broken down food particles will foam up into the skim collection cup and can be dumped regularly.
If you’re not getting low enough phosphate levels with a refugium you probably require more powerful lighting but you can also dose with Brightwell Aquatics Phosphat-E to control phosphate chemically.
Nitrate
Whether you’re going fish-only or want a reef tank, testing nitrate is important. Just like phosphate, nitrate is a result of fish waste and decomposing food in your aquarium. Not over-feeding is the first step in controlling nitrate.
Also like phosphate, nitrate can be controlled by a refugium and protein skimming. This tag-team approach will help keep your aquarium healthy and nitrates low.
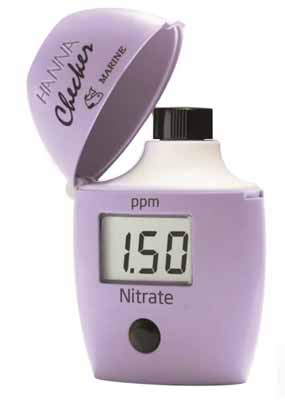
Again, I’m a fan of the Hanna Checkers and the Hanna Low Range Nitrate Checker is a great tool for measuring nitrate levels in your aquarium. Hanna Checkers aren’t cheap so the Salifert Nitrate Test Kit is a great inexpensive option.
You want to see nitrate levels between 0.5-3ppm. There aren’t a lot of good chemical additives for controlling nitrate directly but there are some that help such as Red Sea NO3:PO4-X. You’re better off focusing your efforts on proper maintenance with a consistent water change schedule and ensuring a filtration system like a protein skimmer or refugium are being utilized to their maximum potential.
Maintenance
Maintenance is the most important aspect of ensuring you have a successful marine aquarium. Each system needs to be checked well and ensured that it is working at 100% weekly.
Marine fish and corals are delicate and this hobby requires dedication to proper care.
I’ll run through a list of important tasks that should be performed weekly or at least checked.
- Weekly 20% saltwater changes will do more than almost anything else to ensure your tank is successful.
- Weekly testing will keep you in tune with your aquarium’s needs and issues.
- Filter socks should be cleaned or replaced weekly.
- Skim cups should be dumped to keep them from overflowing.
- Some macroalgae should be removed periodically to ensure there is room for new macroalgae to grow.
- Glass occasionally needs cleaning to remove algae or other film buildups.
- Lenses on lights should be cleaned to remove salt deposits.
If you stay on top of weekly maintenance well, especially saltwater changing and testing, you will almost be assured success.
Suggestion
Many find a weekly 20% saltwater replacement will be the most effective way of keeping your tank healthy. When you perform your weekly saltwater replacement make sure and test for nitrate and phosphate. Having test kits for nitrate and phosphate are a must. Also, test alkalinity if you’re growing corals. Tend to any maintenance that is required for specific equipment such as cleaning or replacing filter socks during this weekly task as well.
Alkalinity Tester
Phosphate Tester
Nitrate Tester
Salinity Tester
Conclusion
Saltwater aquarium keeping is not the cheapest or easiest hobby but it is very rewarding. The beauty of marine fish and corals is tough to beat.
If you’re willing to do the required weekly maintenance and have the budget to afford to set up the system properly and use your test kits weekly, you’ll likely have no trouble with a new tank.